

Why Marine Grade Stainless Steel Corrodes in Saltwater
Last Updated: November 2, 2026
Quick Summary
Marine grade stainless steel corrodes in saltwater because chloride ions break down its thin, self-repairing chromium-oxide film. Chlorides concentrate at weak spots like scratches and crevices, where oxygen is scarce, and the exposed metal then pits and corrodes while the surface looks nearly unchanged.
- Chlorides attack film defects, so scratches, machining marks and weld heat tint are common starting points.
- Crevice corrosion hides under washers, gaskets and deposits, where oxygen cannot rebuild the protective film.
- Rust from embedded iron and tea staining is surface contamination; pitting and crevice attack mean actual metal loss.
- Rinse with fresh water after every saltwater trip, and work it into crevices and bolt holes.
- Use 316 grade for saltwater hardware, and replace any fitting that has lost meaningful section.
Table of Contents
- Why Stainless Steel Resists Rust in the First Place
- How Saltwater Attacks the Passive Layer
- 304 vs 316 Marine-Grade Stainless Steel for Your Hardware
- Marine-Grade Stainless Steel Maintenance That Prevents Corrosion
- Frequently Asked Questions
Marine-grade stainless steel is one of the best materials for a boat, but it is not immune to rust. JewlsCustoms offers stainless steel grill stanchions, flag pole kits and umbrella mounts for boats, and owners often ask why their stainless corroded in saltwater. Marine grade stainless steel fights corrosion with a thin protective film, and saltwater is very good at breaking that film down.
Why Stainless Steel Resists Rust in the First Place
Stainless steel resists rust because it contains chromium, which forms a thin, invisible oxide film on the surface. This passive layer repairs itself when scratched, as long as oxygen is present. Marine-grade alloys add molybdenum, which helps the film resist salt, protection that matters most on a boat.
How Saltwater Attacks the Passive Layer
Saltwater attacks stainless steel through chloride ions, and the attack is selective rather than uniform. Chlorides concentrate at weak points in the chromium-oxide film, a scratch, a machining mark, a weld heat tint, a trapped deposit, and once they penetrate, the exposed metal becomes the anode of a tiny electrochemical cell. The surrounding passive surface stays cathodic, so the pit grows downward and inward while the surface looks almost untouched.
Three conditions accelerate the process:
- Chloride concentration. Salt spray deposits chloride on surfaces and in joints, and evaporation concentrates it further. Splash zones that wet and dry repeatedly see higher effective chloride levels than fully submerged parts.
- Temperature. Warm seawater and sun-exposed decks speed up the electrochemical reaction.
- Oxygen starvation. The passive film needs oxygen to repair itself. Under a washer, inside a gasket joint, beneath a dried salt crust, or in a tight thread, the film cannot rebuild and the metal becomes vulnerable.
Crevice corrosion starts in stagnant, oxygen-poor gaps: under bolt heads and washers, between a stanchion base and the deck, inside swaged terminal fittings, under rubber gaskets, and beneath marine growth or dried salt. The chemistry inside the gap shifts as oxygen is consumed, the local environment becomes more acidic and chloride-rich, and the passive film breaks down even on grades that resist ordinary surface exposure. A crevice attack can perforate a fitting from the inside while the visible surface still looks clean.
Diagnosing what you are actually seeing is the fastest way to fix the right problem:
- Tea staining, light brown surface discoloration, usually surface contamination or a weakened film rather than structural damage. Clean and passivate.
- Embedded iron contamination, small rust spots in a random pattern, often after grinding, wire brushing, or nearby carbon-steel work. The rust is from foreign iron, not the stainless itself.
- Pitting, discrete dark pits, sometimes with a rust halo, typically from chloride attack at film defects. Probe the depth; shallow pits can be cleaned, deep pits mean replacement.
- Crevice corrosion, attack hidden under washers, gaskets, or deposits, often found only after disassembly.
- Galvanic attack, corrosion where stainless contacts a less noble metal such as aluminum or carbon steel, usually near the joint.
Watch out: a rust stain on stainless is not proof the alloy is failing, embedded iron and tea staining are surface problems, while pitting and crevice attack are metal loss, and the two demand different responses.
Once you know the mechanism, the fix follows a predictable sequence: disassemble and inspect the joint, remove deposits and corrosion product, clean and passivate the surface, restore isolation between dissimilar metals, and replace any fitting with measurable section loss.
304 vs 316 Marine-Grade Stainless Steel for Your Hardware
Grade 304 is a solid, general-purpose stainless steel. Grade 316 adds molybdenum, which gives it better resistance to chlorides.
| Grade | Key Addition | Best For |
|---|---|---|
| 304 | Chromium, nickel | Freshwater, light exposure |
| 316 | Adds molybdenum | Saltwater, marine hardware |
| 316L | Lower carbon 316 | Welded marine parts |
For most boat hardware in saltwater, 316 is the safer choice.
Marine-Grade Stainless Steel Maintenance That Prevents Corrosion
Maintenance is not just rinsing. It is a repeatable workflow that keeps the passive film intact, removes the chlorides and deposits that break it down, and catches metal loss before it becomes structural: inspect, clean, passivate, and repair or replace.
1. Inspect on a schedule, not by memory. Do a quick visual check after every saltwater outing, a closer inspection of fittings, fasteners, and joints monthly during the season, and a full disassembly-level inspection of critical hardware, stanchion bases, chainplates, cleats, swaged terminals, and through-hull fittings, at least annually. Pay particular attention to joints, undersides, and any place water can sit. Probe suspect pits with a pick; a pit that catches the tip is worth measuring and monitoring.
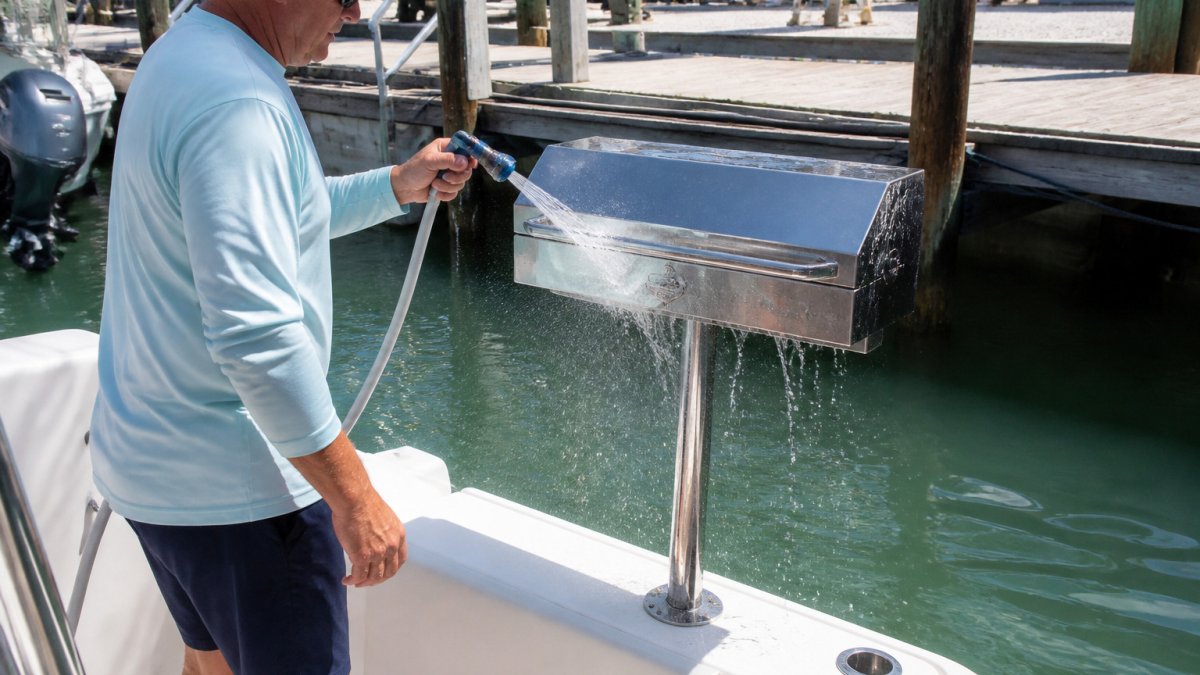
2. Clean to remove chlorides and deposits. Rinse with fresh water after every saltwater trip, and again after any deck work that generates dust or metal particles. Use a soft brush and mild detergent, and work fresh water into crevices, bolt holes, and gasket joints rather than just hosing the visible face. Avoid carbon-steel brushes, steel wool, and contaminated abrasives, they embed iron and seed new rust. Use stainless or nonmetallic tools.
3. Passivate to restore the film. Cleaning alone does not rebuild a damaged passive layer. After removing contamination or corrosion product, apply a citric-acid or nitric-acid passivating treatment per the product instructions, let it dwell, and rinse thoroughly. Passivation matters especially after welding, grinding, or any operation that left heat tint or free iron on the surface.
4. Repair, isolate, or replace. Re-torque fasteners to spec after inspection, replace washers and gaskets that have hardened or trapped salt, and re-establish isolation between stainless and dissimilar metals with isolating washers, bushings, or coatings. Improve drainage so water cannot pond on or inside the fitting.
When corrosion is a safety concern. Surface tea staining and light embedded-iron rust are cosmetic and can be cleaned. Pitting, crevice corrosion, and galvanic attack are metal loss, and the question becomes how much section remains. Any fitting with visible perforation, cracks at a weld or bend, significant pitting at a highly stressed point, or corrosion at a swaged terminal or chainplate should be replaced rather than polished and reused. Rigging and structural hardware deserve a professional inspection when you are unsure.
Installation and design practices that prevent the problem. Most corrosion boat owners blame on the alloy starts at installation. Use 316 or 316L fasteners with stainless hardware, isolate dissimilar metals, avoid water traps and upward-facing crevices, provide drainage paths, seal bedding compounds properly, and keep carbon-steel tools and debris away from stainless surfaces. A well-designed installation with good drainage and isolation will outperform a better grade installed badly.
Watch out: passivating a part that already has deep pits or crevice attack only hides the damage, measure the metal loss first, and replace anything that has lost meaningful section.
Frequently Asked Questions
What's the difference between stainless steel and marine grade stainless steel?
Standard stainless steel grades such as 304 handle everyday moisture well, but marine grade stainless steel, most often 316, contains molybdenum that improves resistance to chloride attack from saltwater and salt spray. Both rely on a chromium oxide passive film. The added molybdenum is what helps marine grade alloys hold that film together in coastal conditions. For boat hardware exposed to seawater, the molybdenum-bearing grade is the safer choice.
Can 316 stainless steel rust in saltwater?
316 stainless steel resists saltwater far better than 304, but it is not immune. Surface rust usually appears when contamination, such as iron particles from tools or grinding dust, sits on the metal and oxidizes. Deposits and stagnant, oxygen-poor crevices can also break down the passive layer over time. Regular rinsing with fresh water and prompt removal of contaminants keeps 316 looking clean and performing as designed.
